Pages

Wednesday, July 31, 2013

Lots of Green Tara Luciousness!!!

Hello! I have two layouts and a card to share 
with you today. I am always just so amazed at the beauty of the 
Green Tara blooms, it's always hard to choose which ones to use,
 I want to use them all! LOL! Anyway, these layouts and card were
 so much fun to create! And one is of course a baby page with an 
adorable pic of our brand new Granddaughter!!!


I wanted to focus on the soft colors in the photo, so I chose the
 papers and blooms to match, all soft hues and shades! 
The blue Damask bloom was perfect for the largest bloom! 
I chose soft blues and yellow/cream. The lace trim was so
 sweet and delicate I added it also. These beautiful papers are from the Three Birds Estate collection, I ordered them from HSN when Anna Griffin was on, and they are gorgeous!!! And awsome quality!!!


I just added a little yellow rose as a finishing accent on this part.


Here you see a small cluster with apple blossom, 
small rose and also some stamped leaves.


One more close-up of the little cluster.


A close-up of the beautiful Damask blue bloom,
And little cream Tutu flower  tucked in beside it.


*******************

My next project is a layout, with a photo of our daughter when she 
modelled for "PinxUps For Soldiers". I used reds and browns/golds 
for this one. Love the black burlap trim with this!


Here is a close-up of one of the clusters, you see all the little blooms
 peeking out from behind the Damask mustard bloom!
 These colors worked so well together! These papers are some really old Graphic45, but they are timeless and classic!


I added a little clock embellishment and used the small natural jute for a bow!


Here you see where I tucked a small piece of lace behind a section
 of the paper. I added liquid pearls too.


Here you can see the Bud-n-Bow trim layered on top of the 
black burlap trim. You can also see the little red flower spray too!


One more close-up of the cluster.


One more where you see the clock and the burlap trim a little better.


********************

My last project today is a card. I used some gold metallic paper,
 so please excuse the glare on the photo, but in real life, the 
embossing shows beautifully and the blooms just pop on the card!!!


This is a window card, I used liquid pearl accents around the oval cut-out.
 I only used two blooms, but the look is striking! The embossing folder is Anna Griffin, Inc. and so is the sentiment sticker! The paper is Anna Griffin Metallic layers (gold).


Here are a couple of close-ups, you can see the beautiful blooms
 and lace on this. I used the gold mesh ribbon for the beautiful bow.


I also would like to mention that I used Plus brand adhesives on these projects and they work beautifully, they hold exceptionally well even on the foil paper!

This card really does look elegant in real life!!! The paper in the 
background is just and old scrap!!! You can use up 
your stash making cards!!!

Thank you so much for stopping by, it really does mean a lot that you take the time to visit my blog. If you leave a comment I will do my best to check back to your blog often too, I love to get new inspiration!!!!

Tuesday, July 30, 2013

New Websters Pages "A Christmas Story"

I was lucky enough to get to guest design for Webster's Pages again, and I got to play with Brandin's new Christmas collection, "A Christmas Story". I didn't get any of the embellishments so I used some older ones that I had in my stash. This collection is wonderful, it has some true vintage elements and at the same time has a few new things thrown in, the traditional red and green with some pink thrown in. It's just so pretty!!!


There are lots and lots of elements to fussy cut!! I had fun with these, and used some pop dots for dimension. I did some faux stitching with my Zig markers too.


Here you see some of the older netting with a cute stick pin beside a cutout candy cane element!


I cut the package from the paper too and used pop dots for it. I also used an older bloom. I cut out the number trim from the new paper! All paper elements are from the new collection!


This is such a fun collection. I hope you give it a try. You can check out the Webster's Pages blog for more inspiration as well! I will have more to share later! Thanks so much for stopping by!!!

Monday, July 29, 2013

Couture Creations Bloom Tutorial


Hello, I have another variation of a bloom made with the Daisy Nesting dies. There are so many different ways to customize hand-made blooms, I really enjoy playing around with them. This one turned out pretty cute! First, here is the finished page.

These flowers were all picked within a mile of my house while walking on a dirt road! I put them in a mason jar glass!!! Lots of perks to living in the country!!!


The first thing that I did was to use the Large Damask Flourish embossing folder from the Elegance Collection and emboss 2 pieces of white cardstock. I cut it into one long section and just embossed each end. I then used two colors of ink, one purple and one blue to get the desired color to match the background.


I also used a chipboard flourish from Imaginarium Designs. I used the same two colors of ink and then topped it off with a coat of the Glitzin Glamour in Crystalina. Such a pretty look!!!


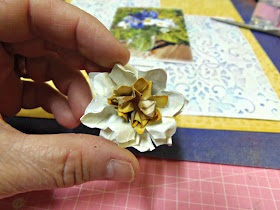
Now for the blooms.  I used the Daisy Nestiing dies in the two smallest sizes. I used the largest of the two for the white outer blooms and the smaller for the yellow centers. I started by inking the edges after cutting them out.


I snipped into each one between each petal, make sure not to snip all the way to the center.


Next spritz with water and curl up as shown.


Let dry, and then carefully pull apart the petals with your piercing tool. Be careful not to tear the tiny petals.


Once unfolder, you can layer them and put them together!!!


After putting all four layers together this is how it will look. You can play around and curl, fluff or do whatever you want with the blooms!


Here you see them on the page, along with the little blue blooms that I used a tiny dot of the Gold Glitzin Glamour for the centers! You can also see where I embossed a piece of green cardstock with the Hyper Magical folder from the Fresh & Fun collection and cut out leaves from it.


Here are some closeups, here you see part of the chippie with the Glitzin Glamour and some of the tiny blooms.


A few more close-ups.


Couture Creations products used:


I hope you enjoyed this post, and I really appreciate you stopping by, please check back to see what else the Design Team has to share!!!

Wednesday, July 24, 2013

CHA time!!!!!

Well, it's that time again, all the excitement and talk about the new stuff at CHA. There have been lots of peeks, so far what have you all seen that you just "have" to have?!?!?!? If any of you that are there have a chance, please check out the Anna Griffin, Inc., WorldWin Papers, Couture Creations and Websters Pages booths!!!

I have projects there even though I didn't get to go!!! I will share a few peeks with you.

First up, Anna Griffin, Inc. has some "GORGEOUS" Holiday lines. Christmas and Halloween. The Halloween collection is so much fun! Here is a page that I did. These papers are fabulous in real life and so many embellies!!!!!


Here is one for WorldWin Papers. This used a variety of their awesome papers!


Just some fun with the title and mixing some old alphas from my stash to match the papers!!!


I used a computer font in different colors on the Heritage White cardstock to make the colored wording paper!


Matching ribbon was all it needed!!! Super quick and fun page!


Thanks for stopping by, I'll share some more projects tomorrow!!! Let me know what you are excited about getting your hands on!!!!!

Wednesday, July 17, 2013

Craft-Dee Bowz & USArtQuest


I had this scheduled for yesterday, but for some reason "Blogger" didn't post it! Imagine that, well better late than never. I wanted to share this because I got to play with some awesome products from USArtQuest!!!

It's time for my post this month here at Craft-Dee Bowz and this month we had a little extra challenge! We had to use the colors tan and blue, keep a beach theme, do a double loop bow, and use some fabulous products from USArtQuest. We got Dicrofibers, Prills, and Mica flakes.

This is my layout, this is one of my very good friends beautiful daughter. I had fun mixing in these products, they were mostly new to me, so it was quite a challenge, but fun!


First of all I used the "Dicrofibers". They are fibers that look like cotton candy! You use a rubber stamp and cover it with StazOn, then you put the fibers of your choice on top, cover with the included paper and heat with an iron!!! The iron melts the fibers and you just peel off the design!! I then use the different colored "Prills" in the center. I attached with "Perfect Paper Adhesive", also from USArtQuest, this is a fabulous glue, it dries totally clear and it's not sticky to touch. I used a hibiscus stamp and just cut into a circle.


I took the light blue "Prills" and first covered the swirl stickers with the "Perfect Paper Adhesive" and then poured the Prills over it. I let it dry and then shook off the excess! I used the Mica flakes in the bottom corner and across the bottom of the mat to mimic a sand look.


Here is a better view of the Mica flakes!


I used some Moxxie paper and stickers, the little leaves are stamped and the little blooms are just small blooms layered together and scrunched! I had so much fun playing with these products!!! I urge you to check out all the fantastic products that USArtQuest has to offer!

Friday, July 12, 2013

Anna Griffin new Floral and Flourish dies, Oh My!!!

Anna was on HSN yesterday and debuted some of her gorgeous new products. One of my favorites are the new flourish and floral dies. These dies are gorgeous. I thought I would share some of my projects today using the floral dies.

For this one I used the die on cream cardstock and then used  Anna's watercolor markers to color them in lightly. I cut them apart to place them.


For this one I used the die with 6 connected blooms, but cut them apart and doubled them! I used them as accents.


 On this one I did the same thing, but also kept one entirely together. So you can see the look, very versatile.


Below is another spray type bouquest, so I colored them in and cut them apart to use as borders for both sides.


These dies are so much fun, and there are so many things you can do with them. You can check out more on Anna's blog or on the Pinterest boards. You can purchase them at HSN! I will share the flourish dies next. Thanks so much for stopping in, I really appreciate it!